Post Purchase Components
Display highly converting upsells, custom forms, and engaging content immediately after the customer pays on the Thank You and Order Status pages.
Getting Started: Create a Component
- Open the SmartFlow Checkout app in your Shopify Admin.
- Navigate to the Post Purchase Components tab.
- Click on Create and select your preferred component from the options.
Available Post Purchase Components
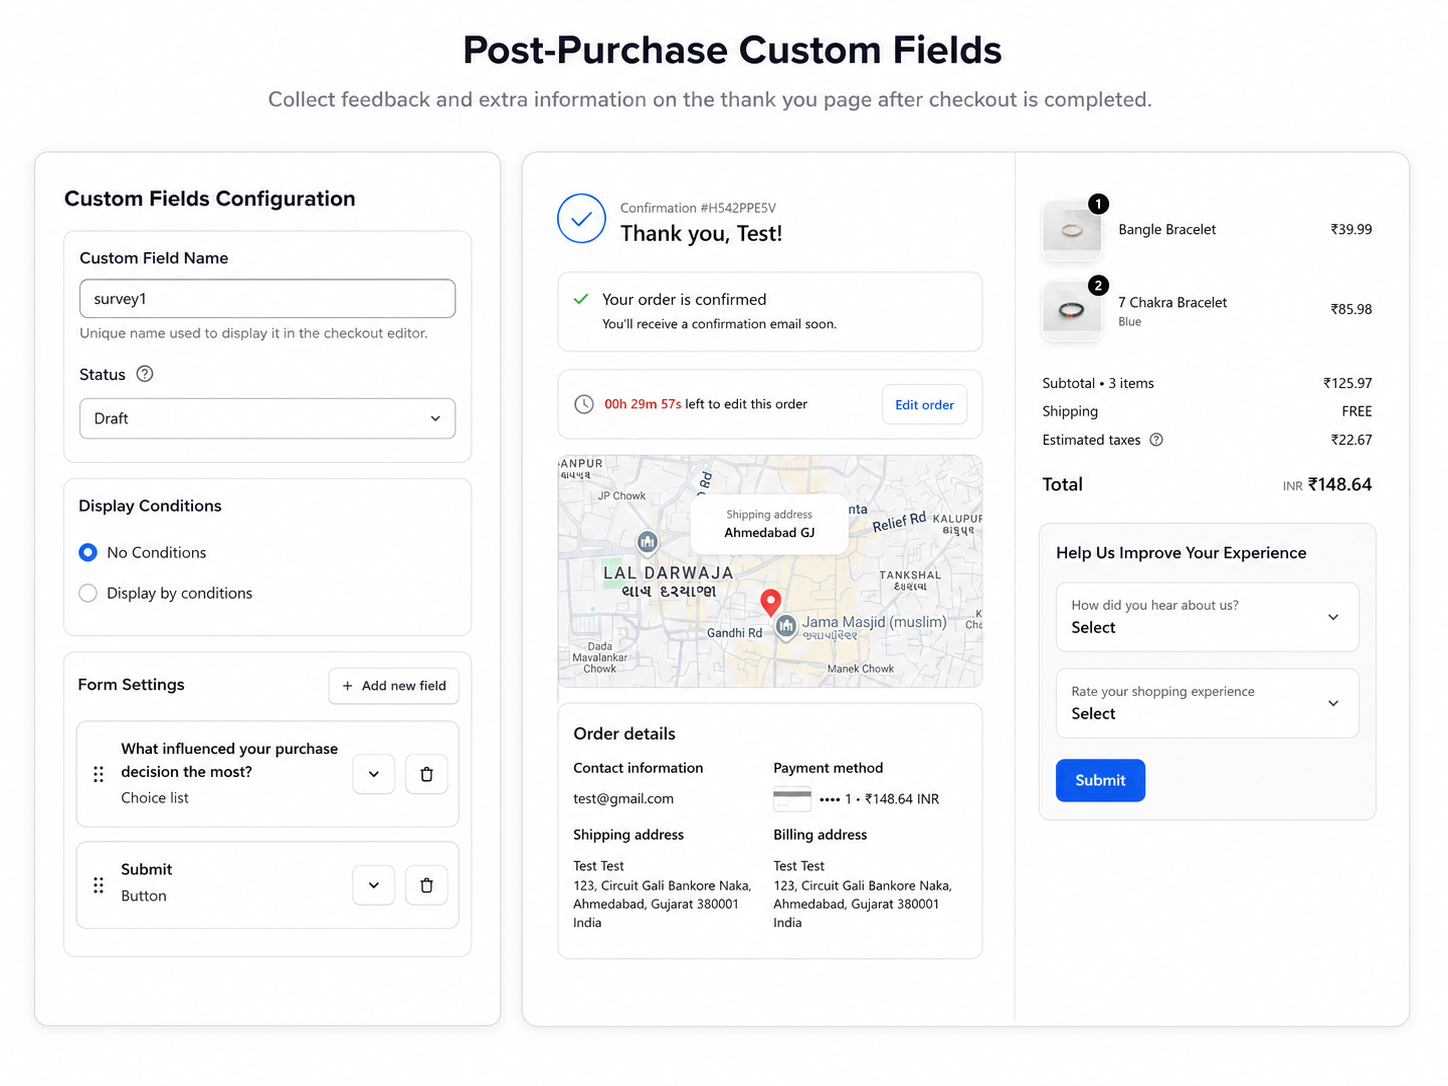
1. Post Purchase Form Builder
Collect additional information after checkout such as preferences, delivery notes, or feedback without disrupting the purchase flow.
Step 1: Basic Configuration
- Enter a unique Form Name. (Important: You will enter this exact name later in the checkout editor).
- Set the Status to Active or Draft.
- Optionally, use the calendar to schedule a Start and End Date/Time.
Step 2: Create Your Form Fields
- Click Add new field to build your form (e.g., Text Field, Dropdown, Checkbox).
- Customize each field’s label, placeholder, width, and alignment.
Step 3: Open Thank You Page Editor
- Navigate to Settings → Checkout in your Shopify Admin.
- Under "Post-purchase pages", click Customize on the Thank You page or Order Status page.
Step 4: Add the Custom Fields Block
- In the editor, click Add block and select Custom Fields.
- Enter the exact unique Form Name inside the block input.
- Once added, the block will automatically load your configured fields.
Step 5: Save and Verify
- Click Save in the editor.
- Place a test order to ensure the form appears correctly and saves data to the order Metafields.
2. Product Upsell
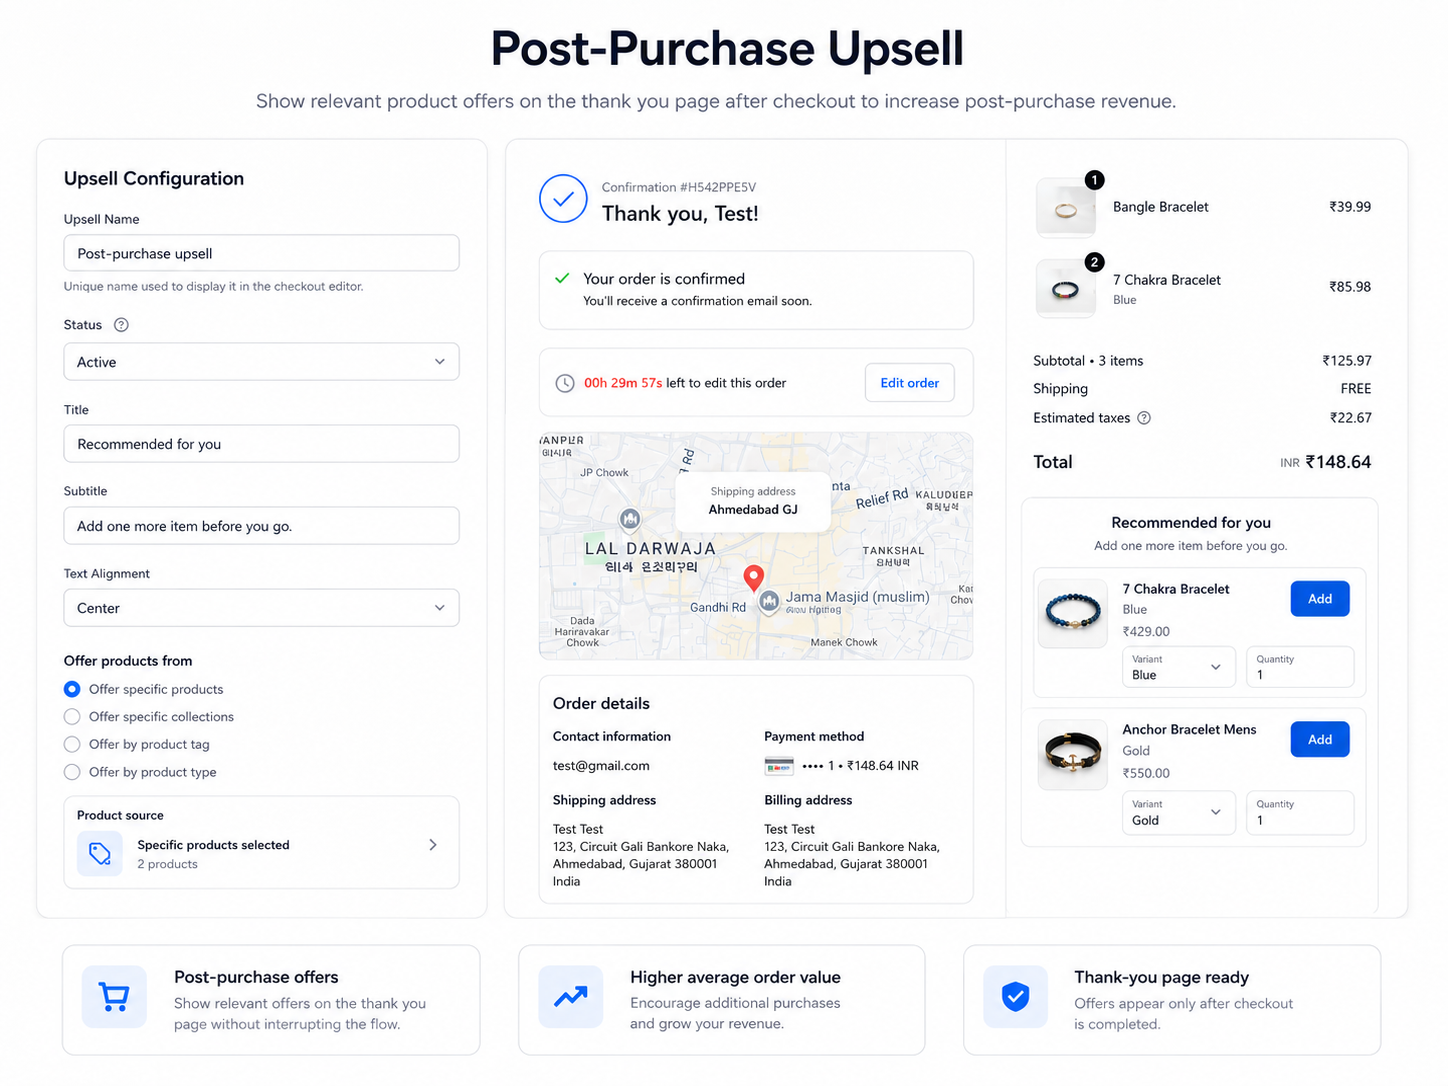
Offer relevant or complementary products after checkout to increase order value with a smooth, one-click post-purchase experience.
Step 1: Basic Configuration
- Enter a unique Name. (Important: You will enter this exact name later in the checkout editor).
- Set the Status to Active or Draft.
Step 2: Configure Upsell Content
- Enter your Title and Subtitle.
- Choose your offer type (Specific Products, Collections, Tags) and adjust Layout Settings.
Step 3: Open Thank You Page Editor
- Navigate to Settings → Checkout in your Shopify Admin.
- Click Customize on the Thank You page or Order Status page.
Step 4: Add the Product Upsell Block
- In the editor, click Add block and select Product Upsell.
- Enter the exact unique Name inside the block input.
- Once added, the block will automatically load your configured products.
3. Custom Banner
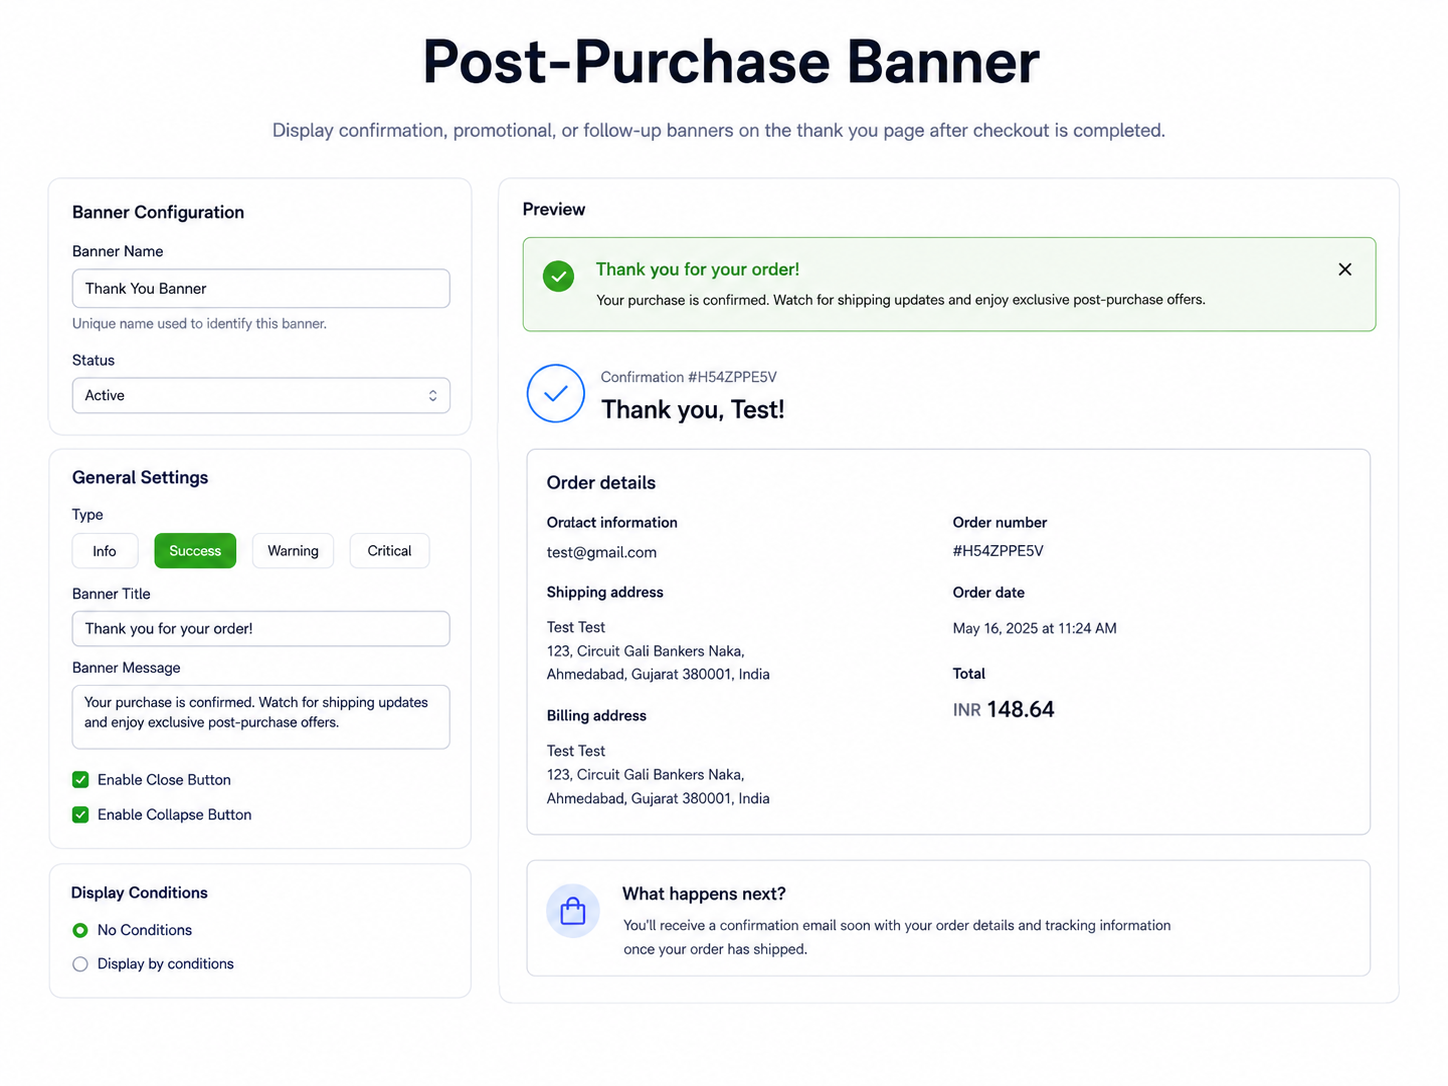
Display follow-up messages, special offers, or next-step instructions on the post-purchase page to keep customers engaged.
Step 1: Basic Configuration
- Enter a unique Banner Name. (Important: You will enter this exact name later in the checkout editor).
- Set the Status to Active or Draft.
Step 2: Design Your Banner
- Enter the Title and Message.
- Choose the Style (Info, Success, Warning, Critical) to match your brand.
Step 3: Open Thank You Page Editor
- Navigate to Settings → Checkout in your Shopify Admin.
- Click Customize on the Thank You page.
Step 4: Add the Custom Banner Block
- In the editor, click Add block and select Custom Banner.
- Enter the exact unique Banner Name inside the block input.
- Once added, the block will automatically load your configured banner.
4. Trust Badges
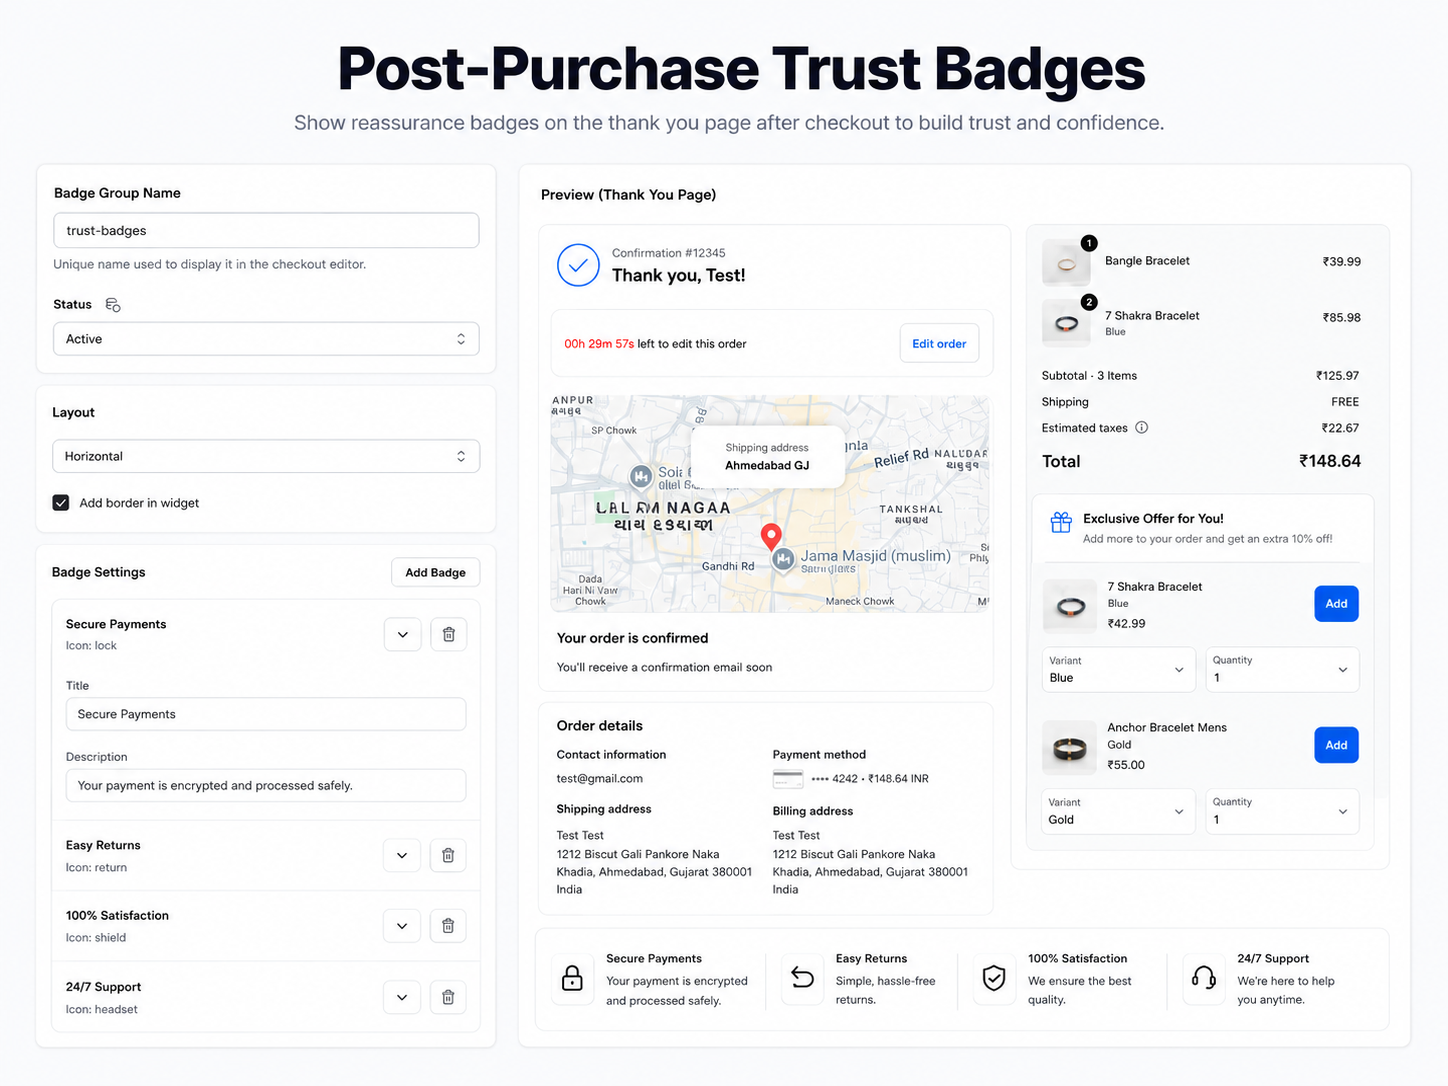
Reinforce trust after checkout by showcasing security, guarantees, or certifications to increase confidence in the purchase.
Step 1: Basic Configuration
- Enter a unique Component Name. (Important: You will enter this exact name later in the checkout editor).
- Set the Status to Active or Draft.
Step 2: Add Badges
- Click Add badge to insert new trust badges into your stack or row.
- Customize text, select built-in icons, or upload custom images.
Step 3: Open Thank You Page Editor
- Navigate to Settings → Checkout in your Shopify Admin.
- Click Customize on the Thank You page.
Step 4: Add the Trust Badge Block
- In the editor, click Add block and select Trust Badge.
- Enter the exact unique Component Name inside the block input.
- Once added, the block will automatically load your configured badges.
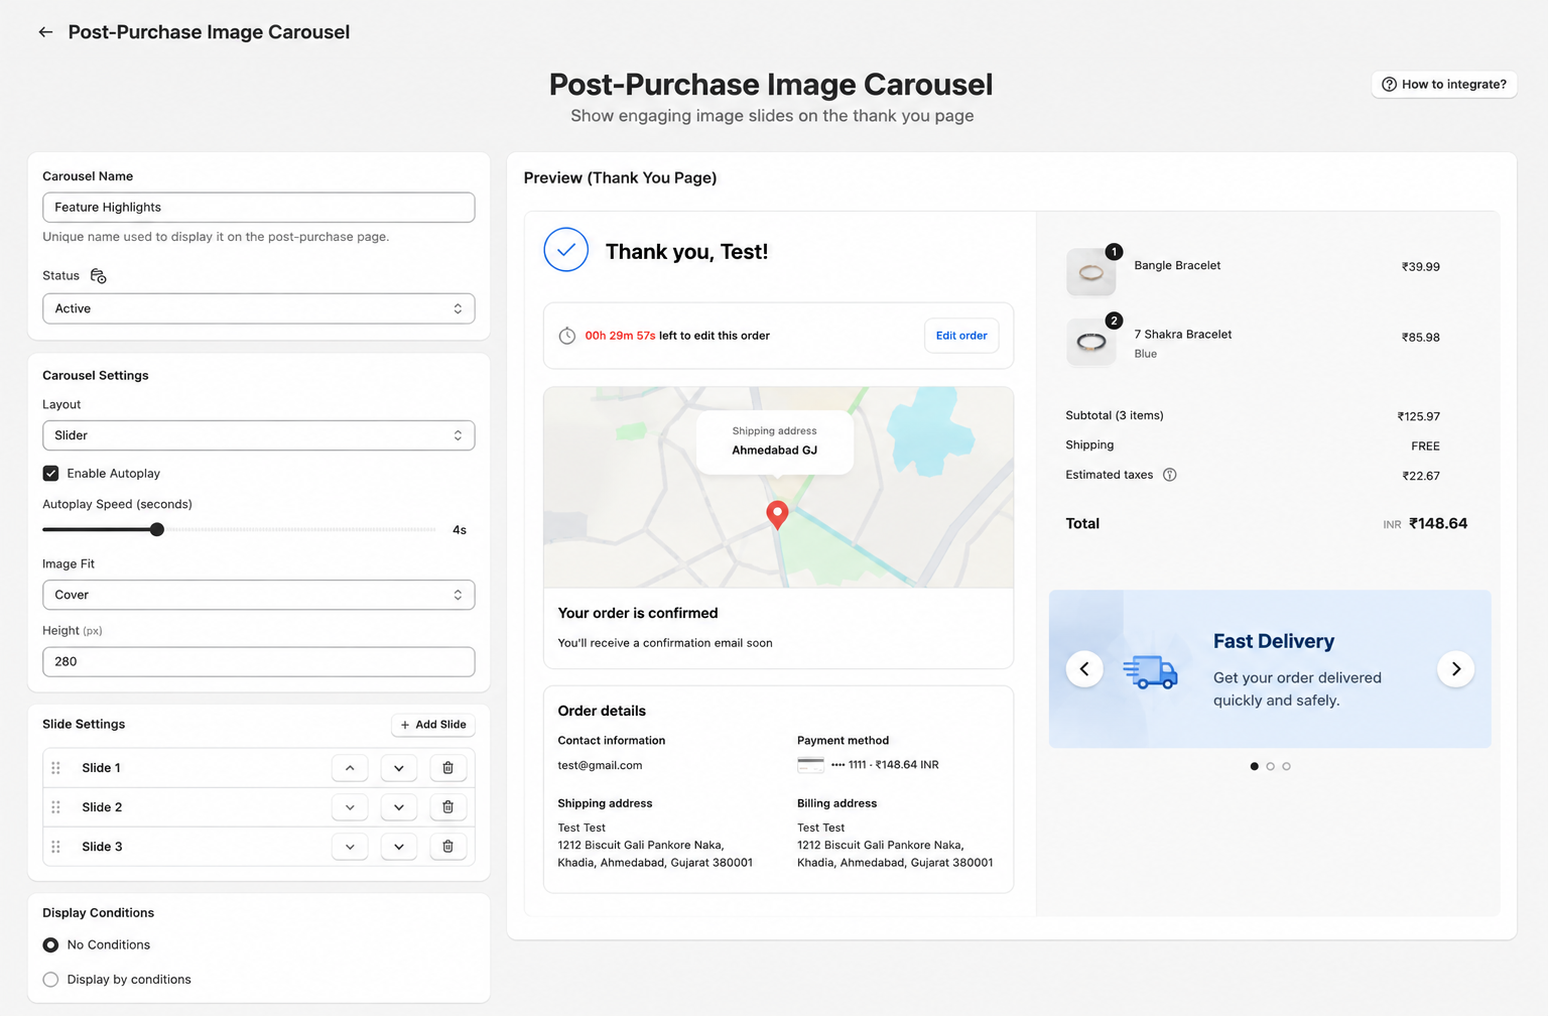
5. Image Carousel
Show brand stories, product highlights, or promotional visuals after purchase to strengthen brand recall and engagement.
Step 1: Basic Configuration
- Enter a unique Name (e.g., carousel). (Important: You will enter this exact name later in the checkout editor).
- Set the Status to Active or Draft.
Step 2: Carousel Content
- Configure dimensions and Autoplay preferences.
- Upload your images, add labels, and optionally include links.
Step 3: Open Thank You Page Editor
- Navigate to Settings → Checkout in your Shopify Admin.
- Click Customize on the Thank You page.
Step 4: Add the Image Carousel Block
- In the editor, click Add block and select Image Carousel.
- Enter the exact unique Name inside the block input.
- Once added, the block will automatically load your configured carousel.
6. Order Editing
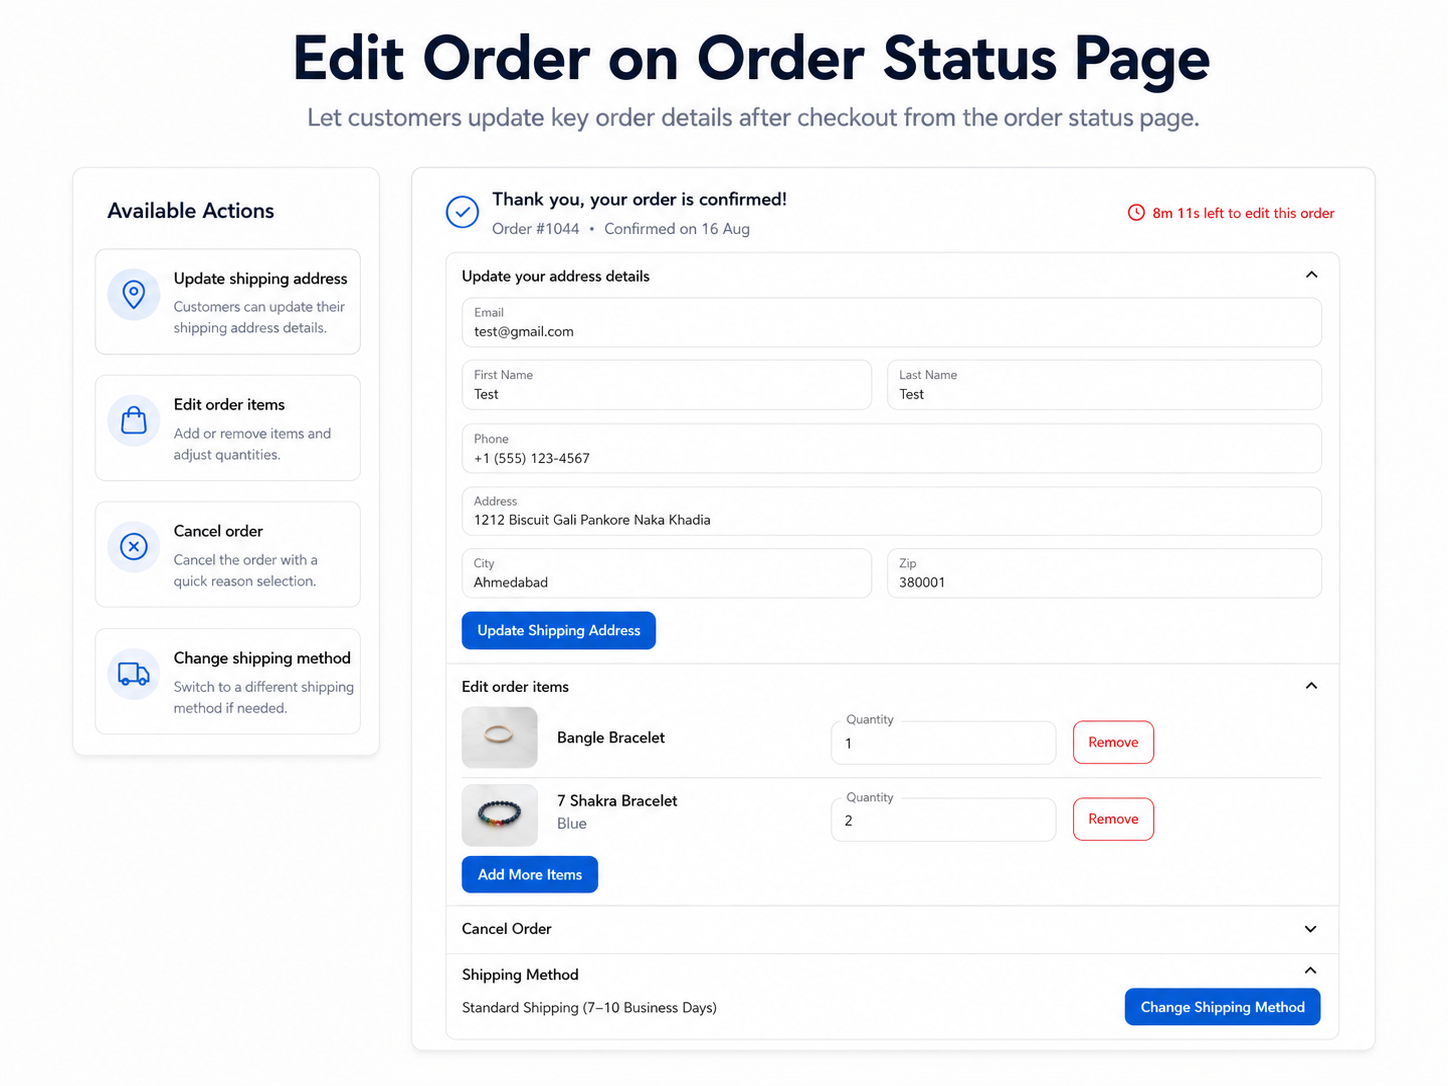
Allow customers to easily edit their orders, address, and items right from the Order Status page within a set time window.
Step 1: Configure Order Editing Rules
- Enter a Name (For internal use only) and set the Status to Active.
- Configure the Order Editing Window: Set Allow edits until (e.g., Order fulfilled).
- Under Order Items, choose how customers can edit orders: Change quantity, Remove items, or Add items.
- Under Address & Payment Edits, select exactly what information customers are allowed to edit (e.g., Edit contact email, Edit First and Last name, Edit phone number, Edit Address, Edit city & zip code, Change shipping method).
- Under Cancel Order, toggle Allow customer to cancel order if desired.
- Set Display Conditions to control exactly when order editing is available.
- Click Save to store your Order Editing configuration.
Step 2: Add Order Editing to the Order Status Page
- Navigate to Settings → Checkout.
- Click Customize on the Order Status page.
- Click Add block and select SmartFlow Order Editing.
- Save the editor to activate Order Editing for customers.
Step 3: (Optional) Show Order Editing on the Thank You Page
- If you want Order Editing visible on the Thank You page, click Customize on the Thank You page in settings.
- Click Add block and select SmartFlow Order Editing to display the editing timer.
- The timer shown on the Thank You page strictly follows the limits you set in Step 1.
Step 4: Customer Editing Flow
- When customers click Edit Order on the Thank You page, they are redirected to the Order Status page.
- All order changes are safely handled on the Order Status page where the block is added.
- Customers can only edit orders while the timer is active and criteria are met.
Step 5: Save and Verify
- Place a test order to verify the Order Editing flow.
- Confirm the timer, redirect, and editing rules (quantity, address changes) work perfectly as expected.
Need help? Contact our support team at support@celirox.com